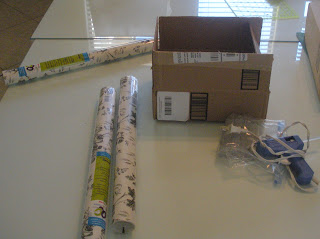
As a very frugal (cheap-o) individual with an ever-growing craft stash, I'm always looking for creative and inexpensive storage solutions. Everything in this tutorial came from the dollar store and the cardboard box was just a leftover from an Amazon order. I can't be the only one who has a few of these laying around!
1. Supplies - cardboard box, packing tape, glue gun, glue sticks, grosgrain ribbon in black, and Contact Quick Cover Shelf & Drawer liner.
2. Decide on Size - Since this box was pretty small, I decided to fold the flaps up and secure them with packing tape. It's now twice the depth. If you have a large box, you can cut off the flaps to make it smaller.
3. Size your Contact Paper - Roll out the paper and measure to decide where to cut to cover your box on all sides, plus enough to fold over to cover the inside. For my box I was able to cut two pieces which slightly overlapped. Think of it as similar to wrapping a gift box.
4. Make the Cuts - in order for your contact paper to fold over nicely to cover the inside and outside, make the appropriate slits.
5. Fold - Pull the backing off of the contact paper, place the box back on top and start folding and wrapping. The Contact paper has some give and forgiveness, so keep pulling and stretching until all the bubbles are gone.
6. Finishing Touches - To create a custom finished look, draw a line around the top edge with your glue gun. Adhere a long strip of grosgrain ribbon to the top edge. If you're feeling fancy, you can add gems, hardware or I chose a simple bow.
7. Enjoy your new (almost free) storage!


